Uploading Files
Select the folder where you would like to upload files. You cannot upload without selecting a destination folder before proceeding to the "Upload Option."
When selecting a folder or sub-folder, DOUBLE CLICK.
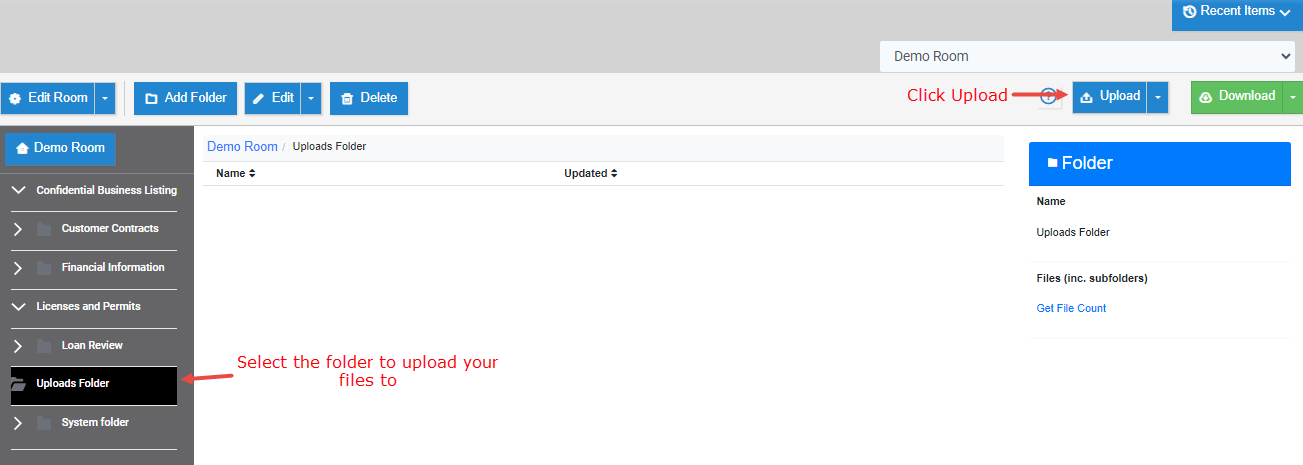
Click the Upload button, and the interface will open. You may select up to twenty-five (25) files by dragging and dropping or navigating from the "add file" section and selecting them for upload.
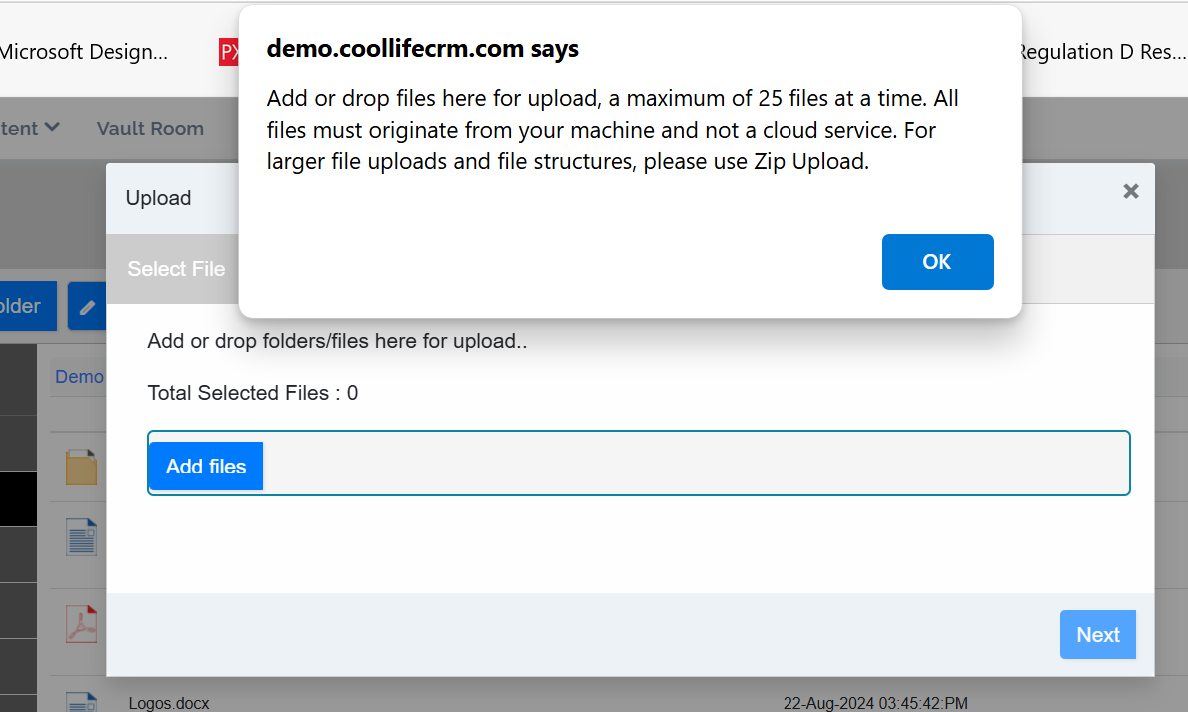
Note: If you want to upload more in a single upload, please see the Zip Upload Guide to complete all your upload files in a single process, which will create the folder structure in the Zip, and the process is automated.
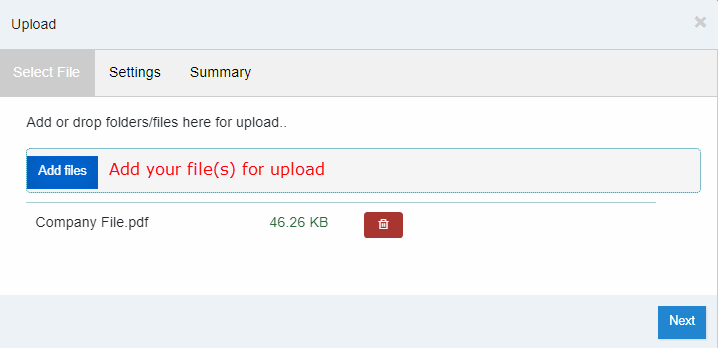
If you exceed (25) files in this process, you will be prompted to limit and unable to proceed.
Set your settings for the upload. Note: These will apply to all files uploaded during this upload.
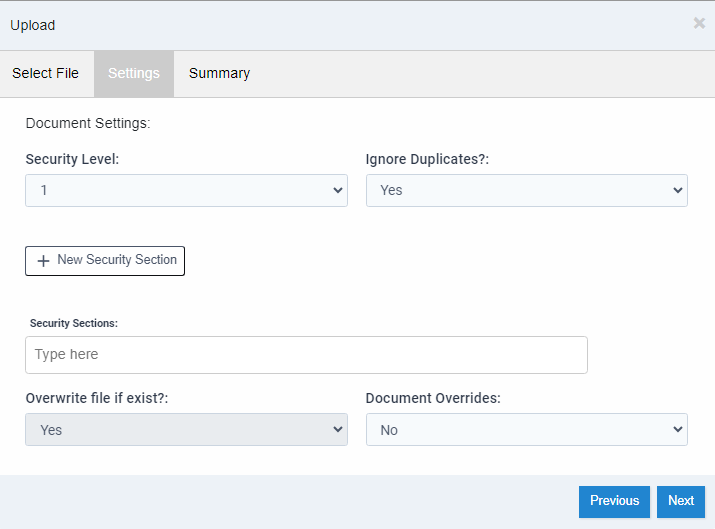
You can choose to notify users when the upload is complete. This will not be instant. Our upload notifications occur based on your room setting: daily(once each day) or weekly (Once a week).
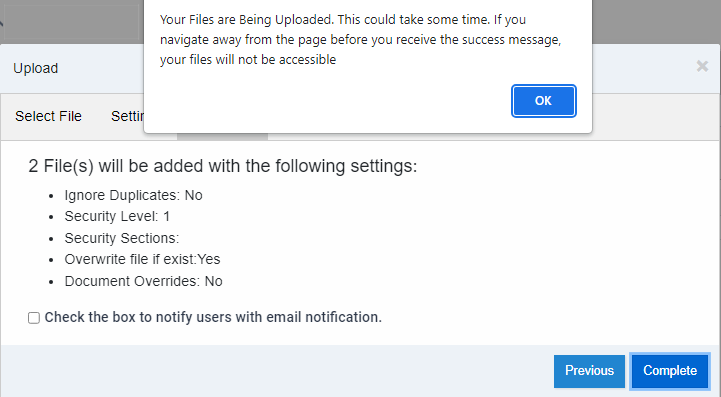
To complete, click OK on the notice and do not leave until you receive the success message.
If you abandon the window, the files will be incomplete and show as a "404 File Missing."

You will now see your files in the data room. Please open some of your recently uploaded files and view them in the application. If you cannot see the file open, you may have failed to allow the upload to complete. (See "report" below)
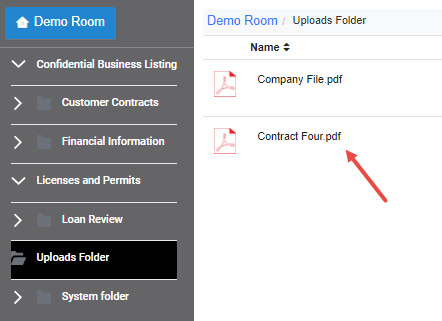
Files that fail to upload successfully may be due to attempting uploads from another online application or navigating away before the success message appears. Please note that larger files may take additional time to upload. See your Reports to view the Failed File Report.

Articles in this section
- Adding a Folder
- Adding a New Room
- Adding Users
- Archiving Room (Admin Only)
- Branding
- Creating a Custom Login Email
- Dark Mode
- Deactivated User Search
- Delete a Folder
- Deleting a file(s)
- Document Viewer
- Document Viewer Overrides
- Editing a Folder
- Editing File Settings
- Editing Your Profile
- Email Room Users Notifications
- Encrypted Files
- File Move/Copy
- Folder and File Naming Restriction's
- Folder Editing
- Folder Templates
- FTP - Support Related
- How to Clear Browser Cache
- Importing Multiple New Rooms
- PDF Upload Best Practice
- Print & Download User Settings
- Removing Encryption from a PDF
- Reports Data Rooms
- Resetting Your Password
- Security Levels and Security Sections
- Support - Requesting assistance
- Uploading Files
- User Search
- Viewing Folders and Files
- Watermarking
- Zip Upload


