Website Modules - Photo Gallery
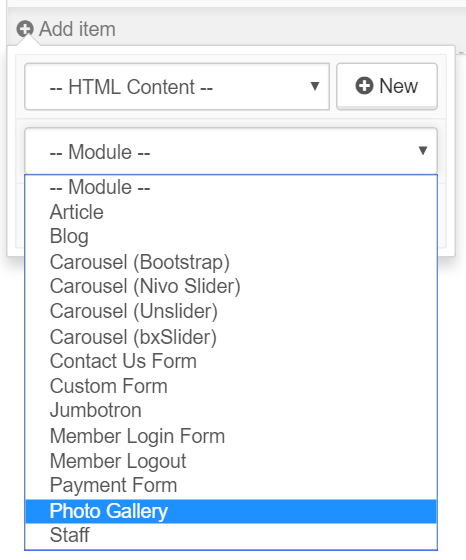
To add a photo gallery to your website, select Photo Gallery from the Modules Dropdown within the Page editor.
The gallery will appear where you placed it within the Page, click the 
- Wrap in Container: This will place padding on the left and right, centering the module on the page.
- Mode: This is the method in which the gallery photos are selected. If you select 'Folder', all the photos in the defined 'Photos Folder' will be displayed. If you select 'Manual Selection', you must add each individual photo that you want displayed, usuing the Manual Photo Selection controls.
- Photos Folder: This is the folder within your Image Browser that contains the photos you want to display (use forward shlashes to specifiy a sub folder, e.g. 'MyPhotos/SubFolder'). If this folder contains any sub folders, their contents will be displayed as well.
- Photos Per Row: This is the number of photo thumbnails to display per row. Must be a number between 1-12, and its recommended to use a number that divides evenly into 12 for best results.
- Gallery Title: This is an optional title text for the gallery, which will be displayed as a heading above the photo thumbnails.
- Gallery Description: This is an optional description text for the gallery, which will be displyed below the gallery title, and above the photo thumbnails.
- Primary Image: This is an optional image that is displayed, full sized, above the photo thumbnails.
- Display Folder Names: Whether or not to use the names of any subfolders as section headings is useful as you organize your photos into albums.
You can also chose to manually select photos for the gallery. 'Manual Select' allows more control over the ordering of the photos, and the ability to add captions.
If 'Manual Selection' mode is enabled, use this area to add the photos to display in the gallery. Drag and drop to change reorder the photos.
Articles in this section
- Add a Google Map to your Website
- Add an Image to Website Content
- Articles
- Event Registration Form
- File Browser
- Food & Services Menu
- Image Browser
- Instagram Feed to Website
- Menu Builder
- Sharing Files with Clients
- Website Content
- Website Modules - Articles
- Website Modules - Artwork Page
- Website Modules - Contact Us Form
- Website Modules - Photo Gallery
- Website Modules - Social Media Icon Module
- Website Modules - Staff
- Website Modules - Staff Table
- Website Pages


